The Top Peaceful Paris Picnic Spots: A Local’s Guide

By Natalie Anne ❤

I know there are sooo many blog posts and recommendations of what to do, see, and experience in Paris. As there should be! Paris is one of the most magical places in the world and in my opinion, is certainly not overrated. My sister and I studied abroad in Paris together one summer and it transformed our lives one Pom’Pote at a time.

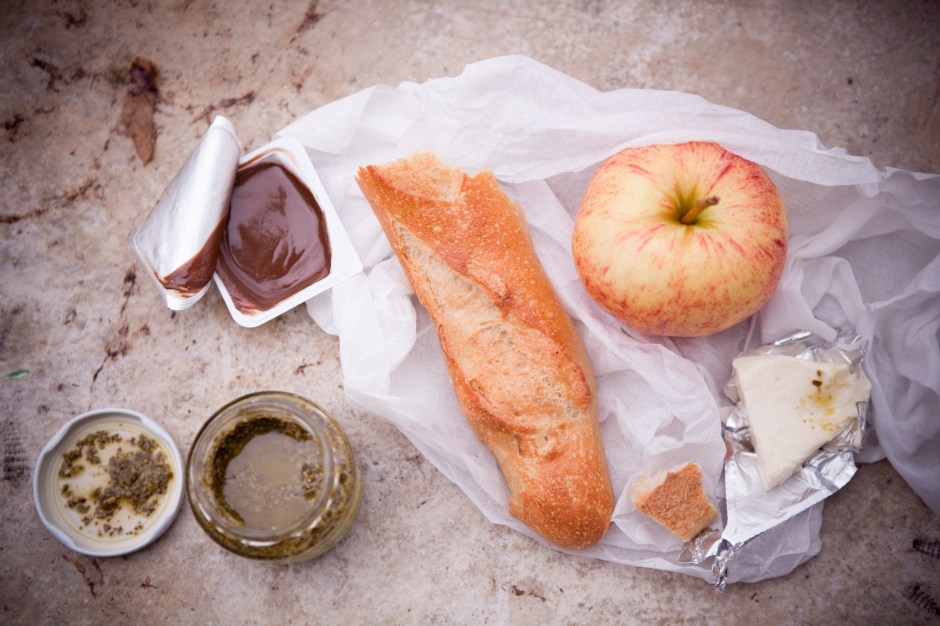
One of our favorite parts of living in Paris briefly, was finding the perfect Parisian spots to seek peace and feast on pastries and picnic food. So here we will invite you to discover our favorite spots in Paris to seek solace while munching on croissants and macaroons:

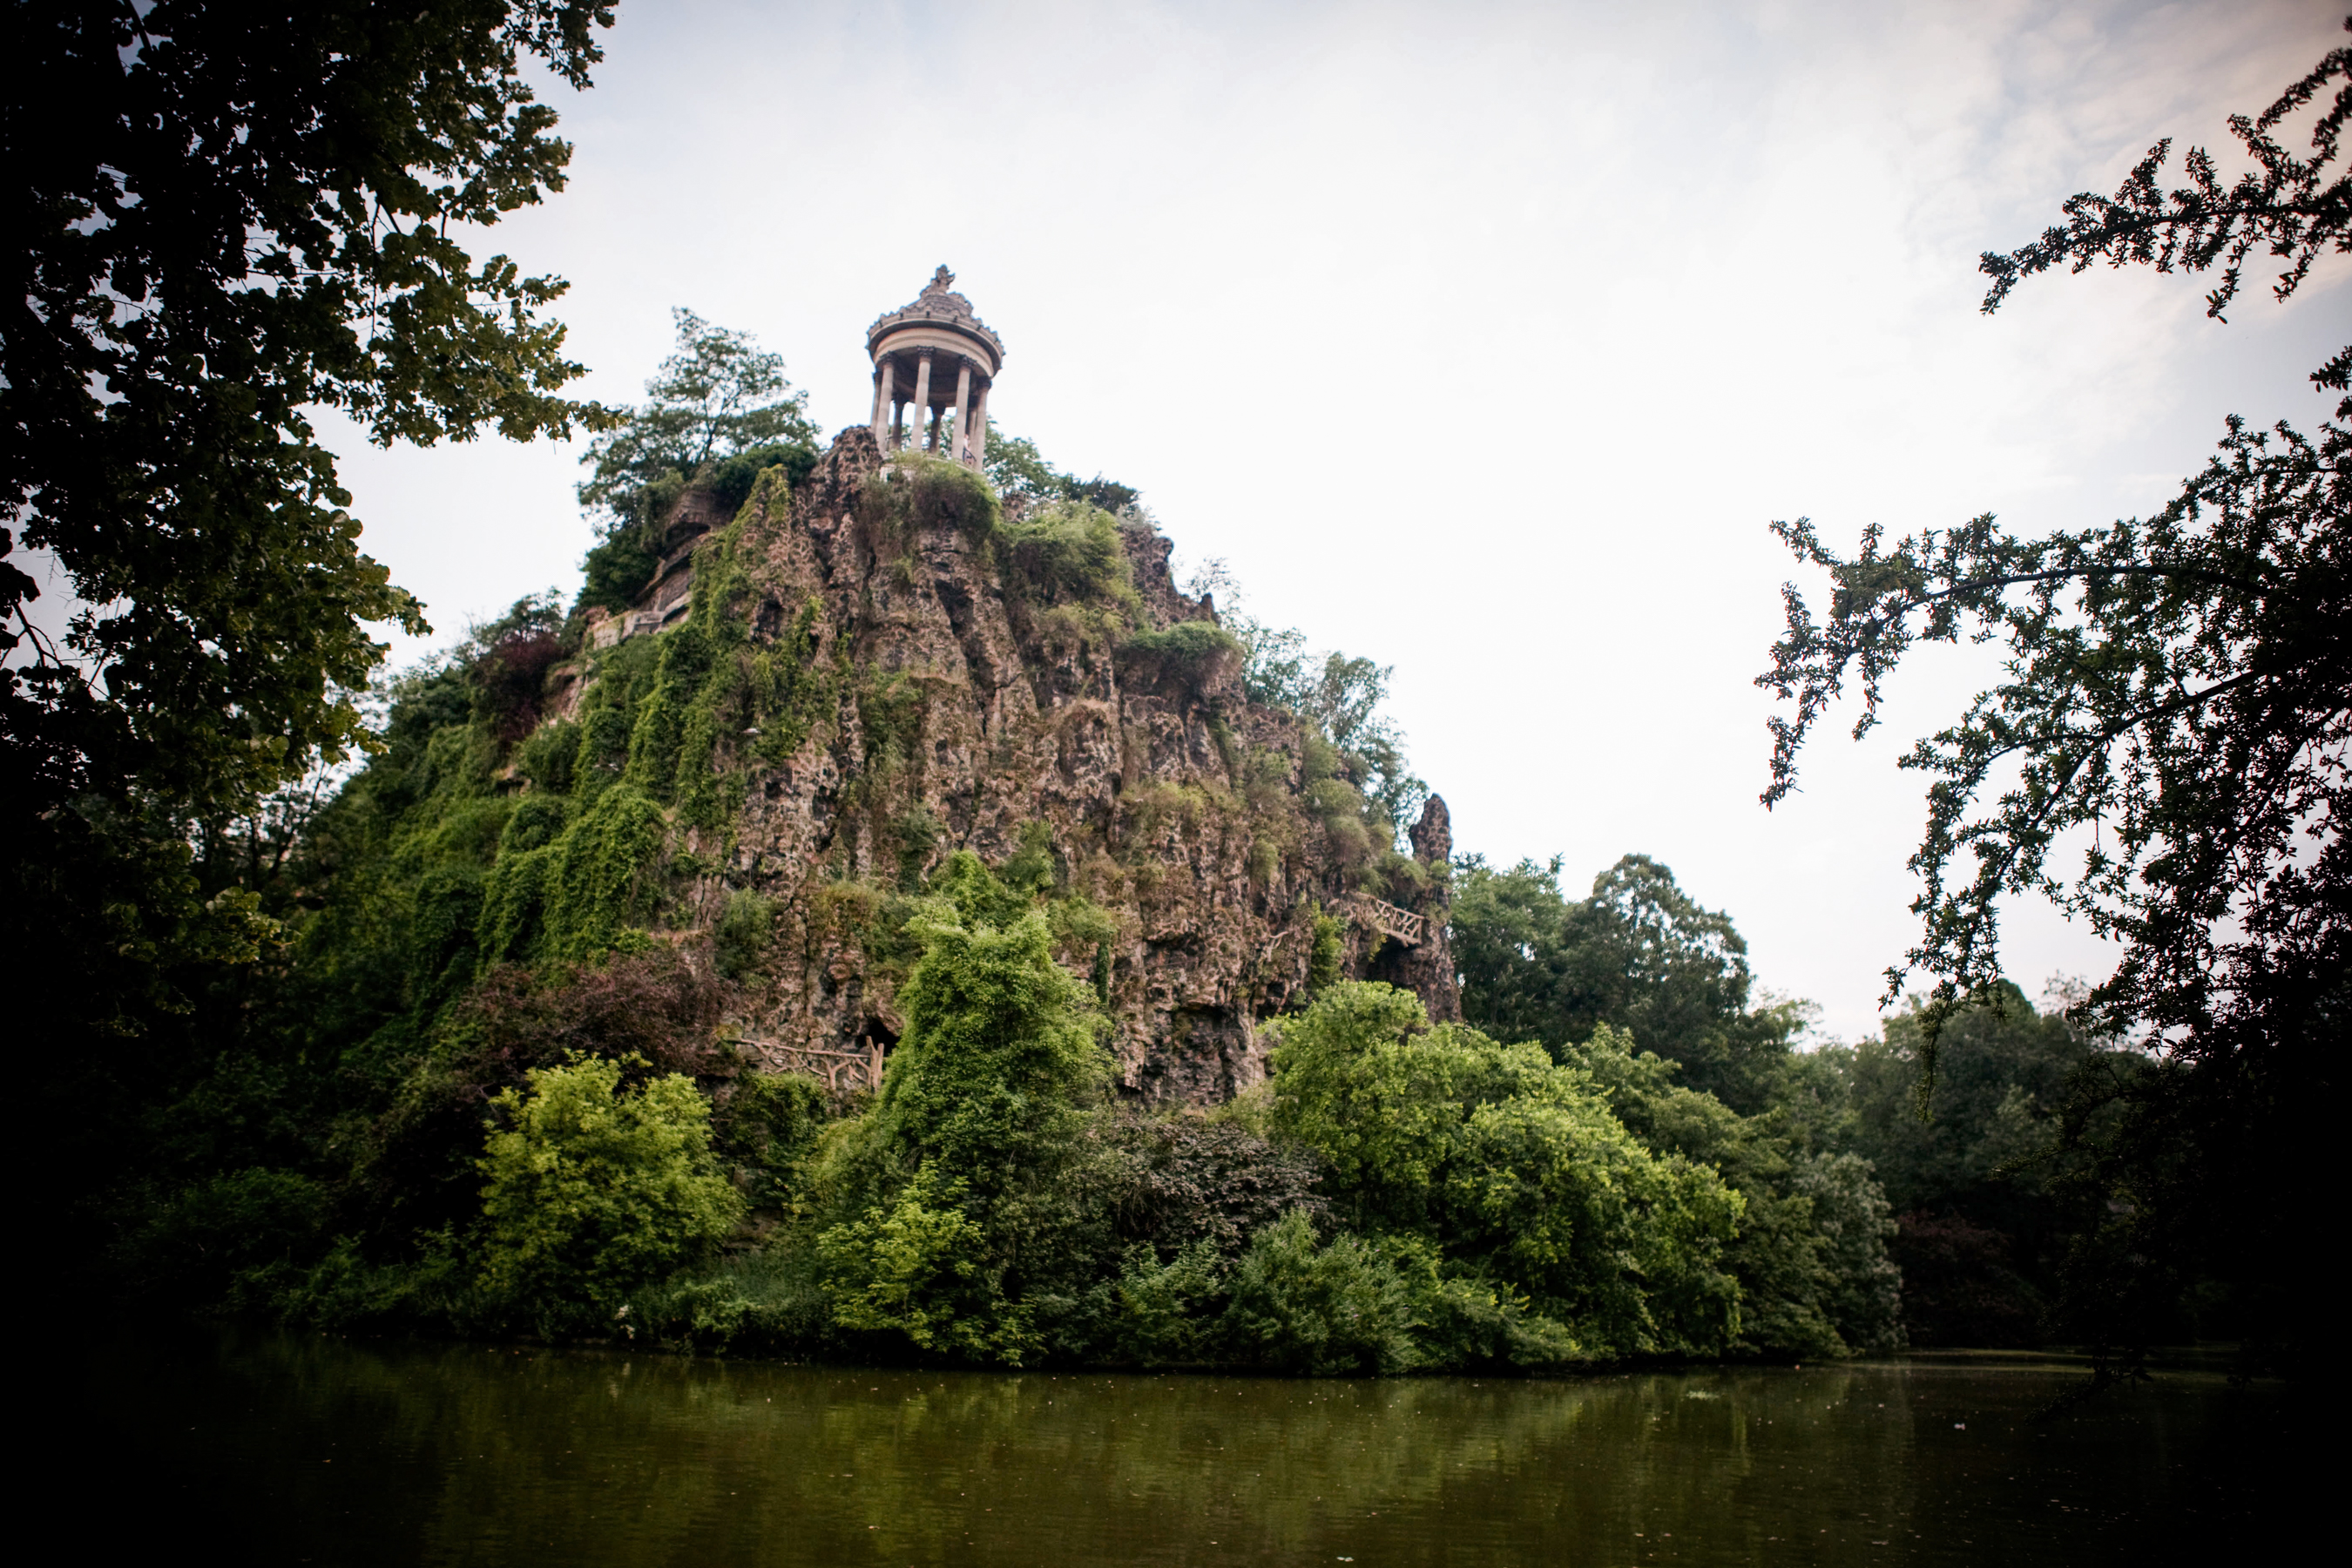
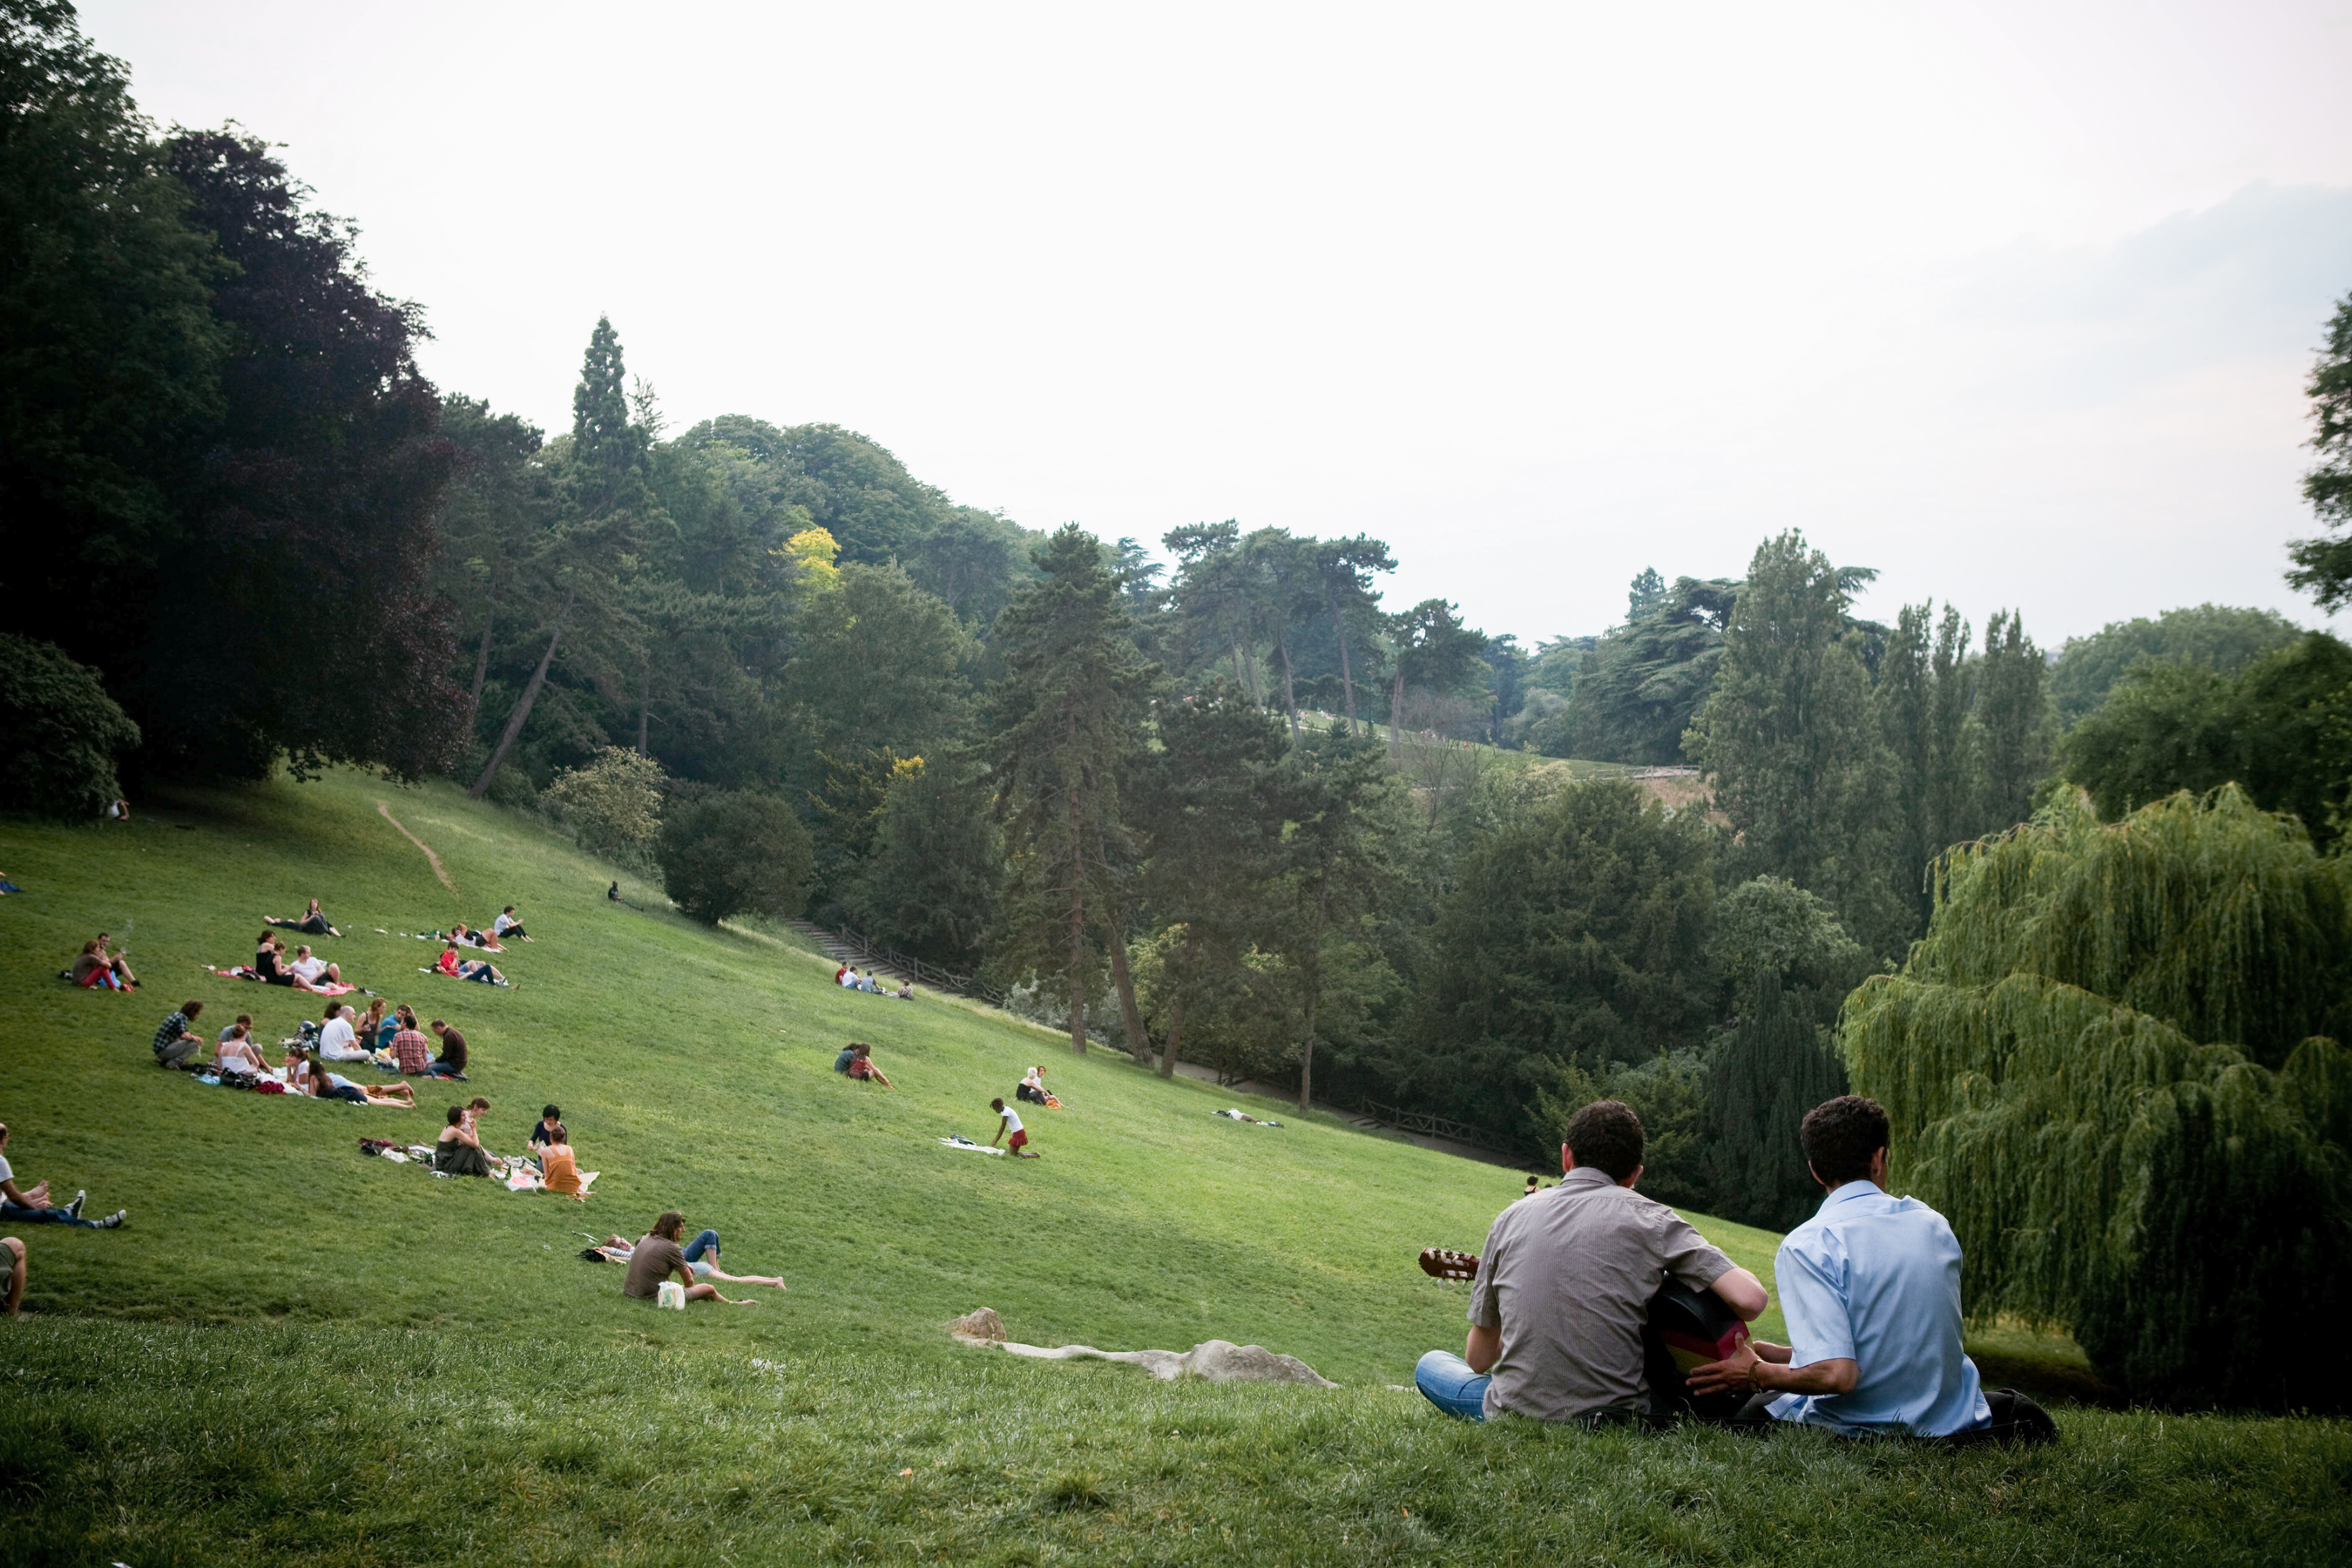
1. Parc de Buttes Chaumont

Myles and I lived in the 19th arrondisement right beside the Ourcq metro stop. It is perhaps not the most well-known area, but it offers some great Patisseries and one of our favorite parks in the world. The Parc de Buttes Chaumont has an incredible view of the city, a beautiful lake, and multiple pathways and trails winding throughout. It is hilly and has a beautiful bank by the river to pull out a blanket, lie down in the grass, and indulge in Parisian bliss. You’ll find Parisians reading books, playing music, hanging out with friends, and enjoying their pastries.
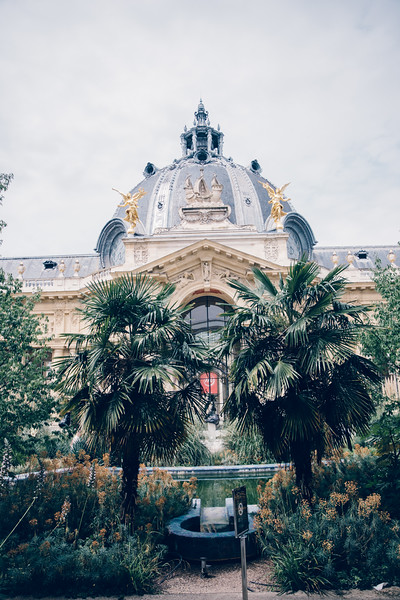
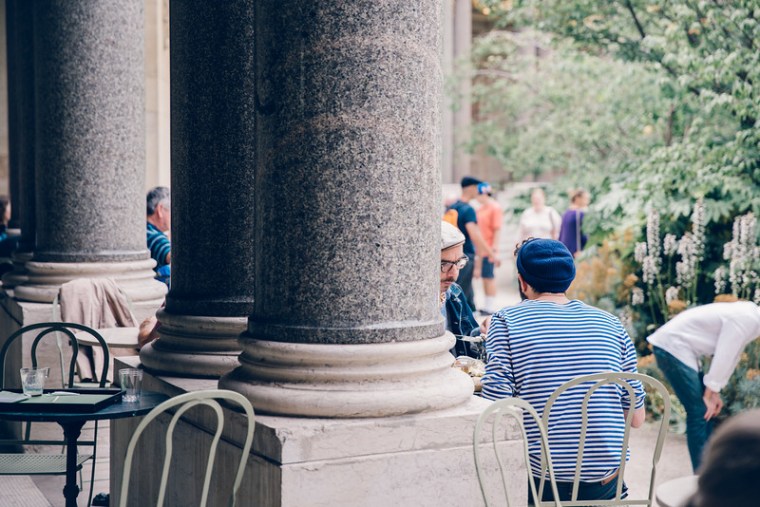
parisfrancepicnicspots-5

parisfrancepicnicspots

2. Le Petit Palais

In the middle of Le Petit Palais is Le Jardin du Petit Palais, a cafe, inside a beautiful, open atrium. This oasis has floors with beautiful mosaic tiling and there are large marble columns and little tables and chairs set up. It is incredibly decadent and idyllic, plus the art collection inside the Petit Palais is one of my favorites in the world, and surprisingly enough, there never seems to be an overwhelming crowd.

PA 29

PA 27

PA 30

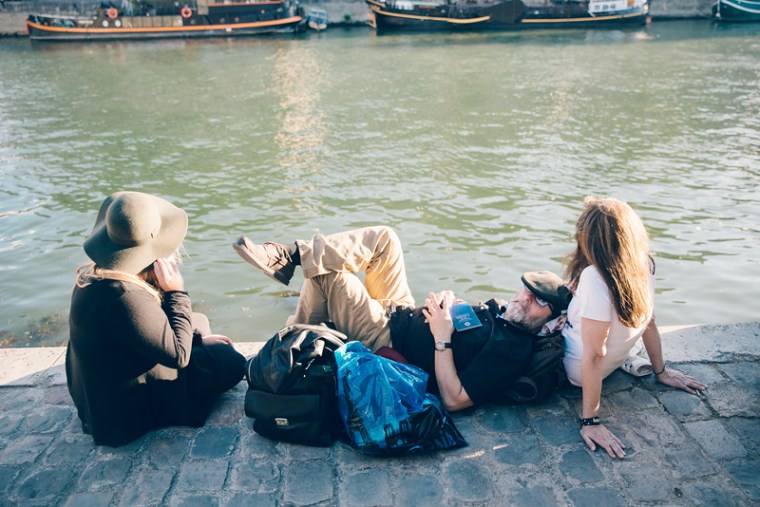
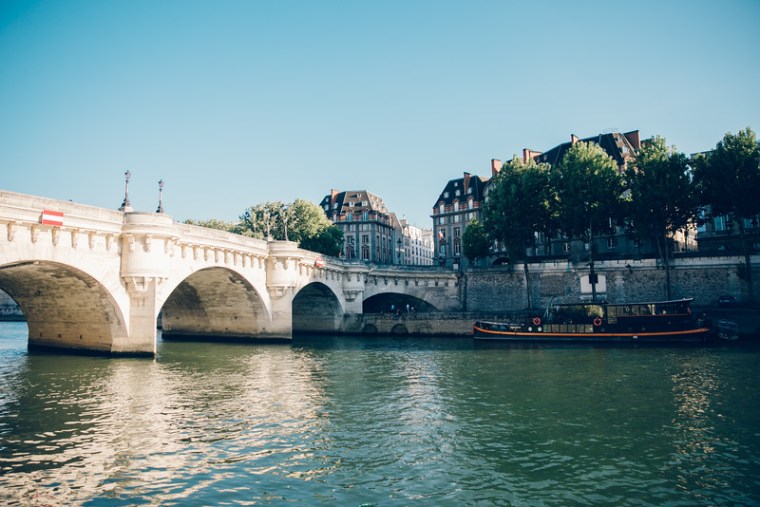
3. Square du Vert Galant on the Île de la Cité

While the Notre Dame de Paris is one of the most beautiful and well-known cathedrals in the world, the island that it sits on is just as special. The Île de la Cité is an island on the Seine right in the middle of Paris. The Square du Vert-Galant is a miniature park area right on the tip of the island underneath Pont Neuf (the oldest bridge in Paris). It provides a perfect hangout area for locals and tourists alike to sit on the river and marvel at the architecture as boats pass you by. Luckily enough, it is also right beside a port where you can hop on a boat for an hour trip up and down the Seine (Vedettes du Pont-Neuf).

PA 42

PA 43

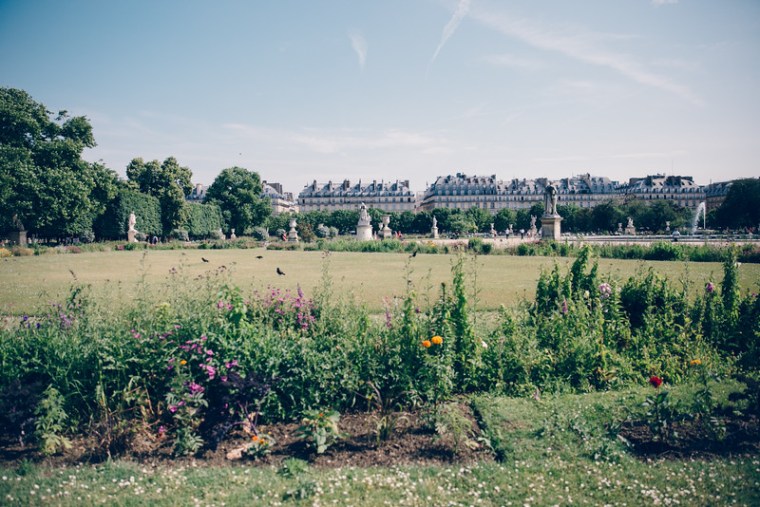
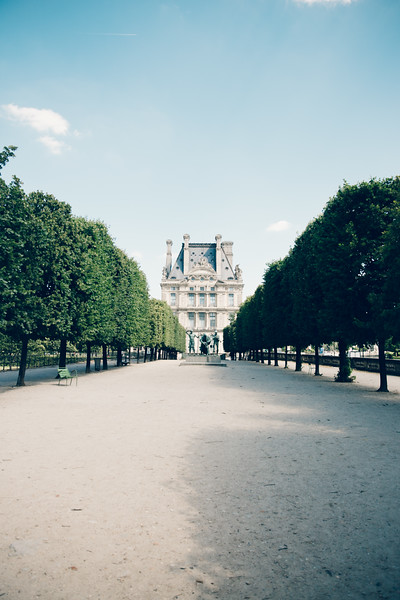
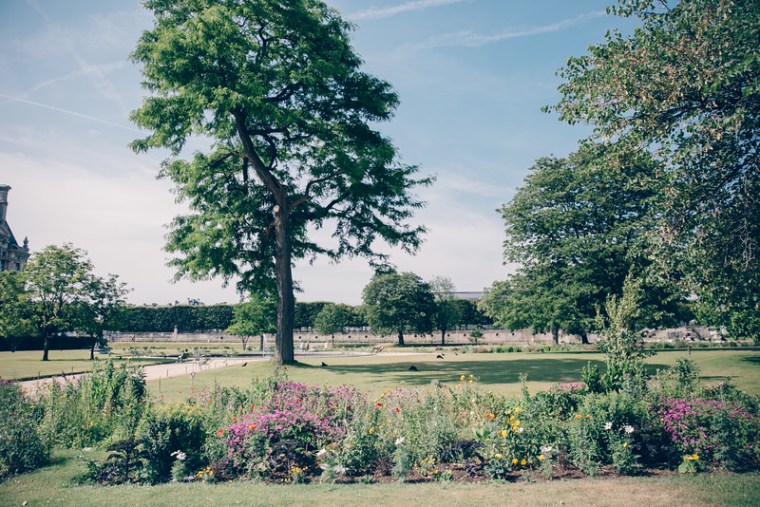
4. Jardin des Tuileries

Located right beside the Louvre and running along the Seine in the heart of Paris, Tuileries is a centrally-located gem that is home to the Musee De L’Orangerie (one of our favorite museums in Paris), multiple fountains, and rows of trees with benches. It offers a slower pace than the city streets while still offering beautiful scenery.

PA 22

PA 41

PA 21

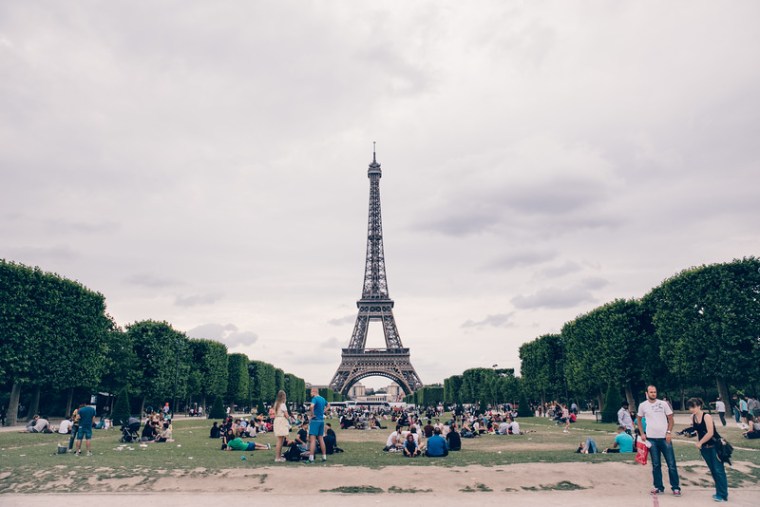
5. The Grassy Lawn beside the Eiffel Tower

Just because this may be one of the more obvious places to go, does not make it any less special. Who doesn’t want an awe-inspiring picture of themselves lounging in front of the Eiffel Tower and relishing in its splendid beauty? Perhaps not one of the more peaceful locations, the grassy lawn in front of the Eiffel Tower is still a popular spot to lie in the grass with a baguette and some brie.
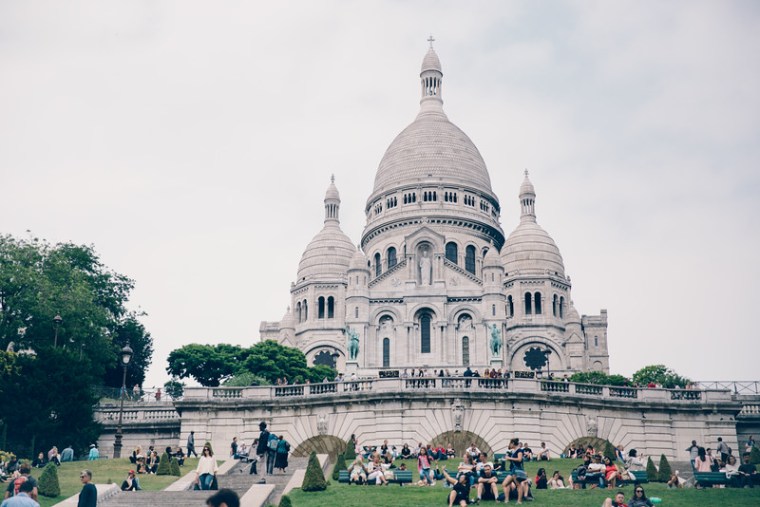
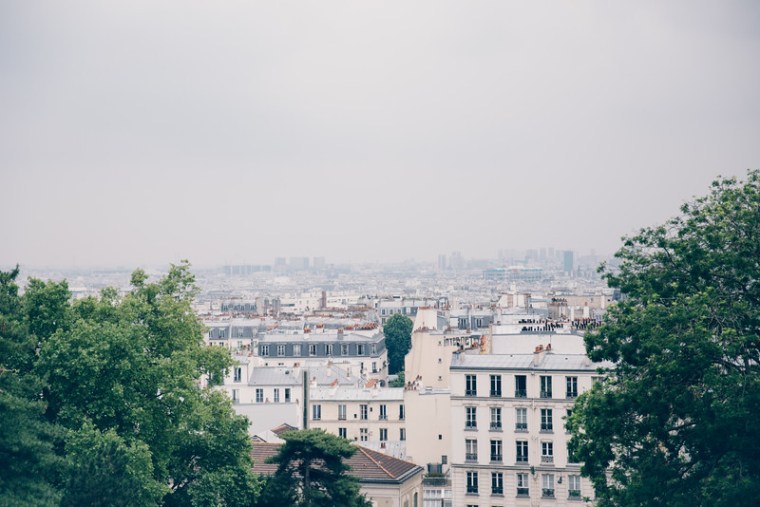
PA 33

6. Sacré-Coeur

Another popular location, the Sacré-Coeur is a dramatically stunning cathedral situated on the hill in Montmartre and offering one of the most famous view of the City of Love. The streets surrounding the Sacré-Coeur are filled with painters, artists, vendors, restaurants, and picturesque corners. You could spend an entire day wandering through these streets, visiting the cathedral, enjoying the stunning view, and taking millions of photographs. It’s one of our favorite places to visit in Paris. We’ve been there a handful of times now and it’s impossible for us to visit Paris and not stop by this beautiful part of the city.

PA 35  PA 36

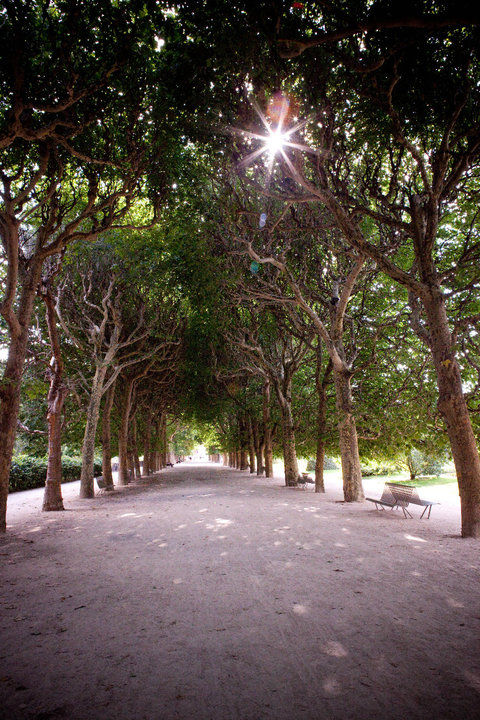
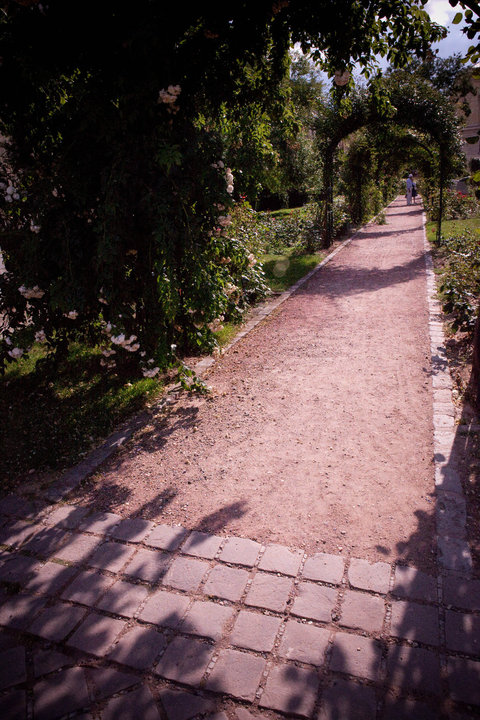
7. Jardin des Plantes

The Jardin des Plantes is not the most popular destination for tourists, which makes it ideal for peace and an undiscovered treasure. Its Alice in Wonderland-like pathways, hedges, and trees create an enchanting experience that feels almost secretive. This botanical garden is home to the Museum of Natural History and houses a small yet delightful zoo. If you’re looking for a place to get away from the hustle and bustle of the busy city, this is the perfect spot.

PA 10

PA 50

PA 51

Review: Blue Apron Food Subscription Box

By Natalie Anne ❤

BA 4

I love to cook. I am inspired by discovering new recipes and flavors. But, sometimes, it can be daunting to have to go to the grocery store and collect a bunch of different ingredients. Sometimes you’re not sure which is the freshest or the most delicious or the easiest on your wallet. This is where a subscription to Blue Apron can come in handy. They send you a box of fresh, local ingredients once a week for three meals that feeds two people (with plenty of leftovers). They are prearranged menus that focus on  balanced and healthful recipes.

Every box comes with a step-by-step instruction packet with pictures for preparing and cooking your food. Plus, you can always change up the recipes to make it your own if you choose. Blue Apron sends you the exact amount of items and ingredients you need: spices, proteins, milk, eggs, the list goes on and on. The only things not included are salt, pepper, and olive oil (pretty easy to handle those on your own).

My favorite part about Blue Apron is that you can sign up for whatever weeks you desire. You can have a subscription and receive a box every week or whenever you feel ready for one. You can browse through the menus online and click which weeks you wanna cook with Blue Apron and it’s that easy.

The recipes have broadened my cooking abilities with new flavors and it has been fun using ingredients I would have felt too intimidated to pick up in a grocery store.

The menu for my first week with Blue Apron was:

Trinidadian Chicken Curry and Coconut Grits with a side of Collard Greens

BA 2

BA 5

My Favorite 🙂


Pretzel Burgers with a Hoppy Cheddar Sauce and Sweet Potato Rounds:

BA 1

BA 7

and Acorn Squash Risotto with Crispy Sage and Radicchio Salad

BA 9


Red Curry with Chicken and Avocado + Jasberry Rice Pudding with Mango

by Myles Katherine ❤

Curry is one of my favorite dishes to make because you can improvise using whatever vegetables you have in your house. I could hardly wait to try the Red Curry from my Try the World Thailand Box (read more about Try the World here) because I’ve heard such great things about it. You can use CLB20 for 20% off your first order!

For dessert, Jasberry Rice Pudding with sliced mango. My sister made the Jasberry Rice Pudding with Banana slices earlier this week. If you don’t want to sign up for the subscription boxes, you can still order these ingredients (like the Jasberry Rice and Nittaya Curry Paste) from their online store!

I adapted the recipes to serve 2 instead of 4, and used chicken instead of beef. I also didn’t have fish sauce so I used soy sauce for the salty flavor. 🙂

RED CURRY WITH CHICKEN AND AVOCADO

Ingredients:

From the Try the World Thailand Box

– 2-3 TBSP Nittaya Thai Curry paste (can be substituted with other curry pastes)
– 1 cup cooked Jasberry rice (can be substituted with white or brown rice)

From Your Pantry

– 1 14.0z can of coconut milk
– 1 TBSP soy sauce or 1 TBSP fish sauce
-2 TBSP Tamarind Concentrate or 1/2 TBSP Tamarind Paste
– 1 TSP sugar

Fresh Meat & Produce:

-4 Fresh Kaffir Lime Leave (optional)
– 1 Russet Potato, peeled and diced
– 1 Sweet Potato, peeled and diced
– 1 Large Carrot, cut lenthwise and sliced 1/4 inch thin
– 1/4 cup basil (with stems)
– 1/2 pound boneless white chicken, sliced
– 1/4 small onion, thinly sliced
-2 cloves of garlic, chopped
– 1/4 red bell pepper, sliced, for garnish
-1/2 avocado, diced

Directions:

  1. Heat a skillet over moderate heat. Combine 3 to 5 tablespoons of the thick coconut cream from the tops of the can with the curry paste and lime leaves. Transfer to a pot and cook until fragrant and browned, about 3 minutes.
  2. Add the remaining coconut milk and bring to a boil. Add the potatoes, carrots and basil leaves and continue to boil until reduced by a quarter, 5 to 10 minutes.

3. Add the chicken, onion, garlic, soy sauce or fish sauce, tamarind concentrate and sugar. Reduce the heat and let simmer until the chicken and vegetables are cooked through, about 20 minutes.

4. Add the avocado and mix in until warm. Transfer to two plates, garnish with bell peppers, and serve with the cooked rice.

redcurry-8


JASBERRY RICE PUDDING WITH MANGO
(adapted from Try the World – serves 2)

Ingredients:

From the Try the World Thailand Box

-1/2 cup Jasberry Rice

From Your Pantry

-1/4 TSP salt
– 1/2 13.7 oz can coconut cream, stirred
– 1/8  cup brown sugar
– Fruit (optional), for garnish

Directions:

  1. Bring the rice, salt and 2 and 1/4 cups of water to a boil. Cover, reduce the heat, and let simmer for 35 minutes. Strain, then return to the pot. Stir in 1/2 cup of coconut milk and the sugar and bring to a boil over high heat, then reduce and let simmer, stirring occasionally for about 20 minutes. Let cool.
  2. Transfer to two bowls, add the remaining coconut milk, and garnish with fruit.

redcurry-9

Jasberry Rice Pudding with Coconut and Honey Banana Slices

By Natalie Anne ❤

I woke up this morning with the sun streaming into my apartment after what seemed like a never-ending row of days with rainy and cloudy weather. I had a hair appointment at a new salon I was kinda nervous about…But once I got my hair cut and colored, I knew I finally met my hair guru/stylist soulmate. When I got back to my apartment with a new cut and fresh attitude, I knew it was time to try Try the World‘s Jasberry Rice Pudding recipe from their Thailand Box. I wanted to add a side of fruit to it, so I found a recipe for fried bananas and incorporated that into the dish.

I followed the Try the World recipe, except I added a spoonful of white sugar to the brown sugar and a little bit of their coconut flower syrup to the pudding, as well as a few drops of vanilla extract after I removed the pudding from the heat at the end.

Be sure to use our code CLB20 for 20% off your first order at Try the World and learn more about Try the World here!

Ingredients:

  • ⅔ cup Jasberry rice
  • ½ tsp. salt
  • 1 13.7 oz. can coconut milk, stirred
  • ¼ cup brown sugar
  • Fruit (optional), for garnish

Rice pudding 2

Directions:

1. Bring the rice, salt, and 3½ cups water to a boil. Cover, reduce the heat, and let simmer 35 minutes.

2. Strain, then return the rice the pot. Stir in 1½ cups coconut milk and sugar and bring to a boil over high heat, then reduce and let simmer, stirring occasionally for about 20 minutes.

3. Let cool. Transfer to 4 bowls, add the remaining coconut milk, and garnish with fruit.

Fried Bananas in Coconut Oil topped with Honey and Cinnamon (recipe borrowed from PaleoLeap

Ingredients:

1 sliced banana

2 Tbsp. Honey

1/4 teaspoon Cinnamon

2 Tbsp. Coconut Oil

Directions:

  1. Combine the honey with ¼ cup of warm water and mix well.
  2. Heat the coconut oil in a skillet placed over medium-high heat.
  3. Add the banana slices to the skillet and fry for 2 minutes on each side.
  4. Remove the skillet from the heat and pour the honey mixture on top.
  5. Sprinkle with cinnamon and serve.

rice pudding 1

Bon Appetit!


Simple & Cozy Four Cheese Kielbasa Sausage Lasagna

It was always on those especially freezing winter days when I would come home from school and smell the beginnings of this lasagna cooking on the stove. It has such a heartwarming flavor to me so it seemed appropriate to dust off my mom’s recipe and try  it out for myself during this cold February. I tweaked it a little bit and cut the original portions in half. So I would say this recipe makes about 5-6 servings. Also, don’t mind my round pan I had to cook it in, I would definitely recommend baking any lasagna in a square/rectangular dish (ideally a 10 x 10 or 10 x 12 for this recipe).

Kielbasa Tomato Sauce:

2 Cloves Garlic ( or Trader Joe’s Crushed Garlic)

1/2 White Onion

1/2 Cup Shredded Carrots (optional)

1 16 oz Package of Kielbasa Sausage (I used Hillshire Farm Polska Kiebasa)

1 28 oz Can of Tomatoes (I used Trader Joe’s Unsalted Crushed Plum Tomatoes)

1 8 oz Can Tomato Paste

1/2 Teaspoon of Basil, Parsley, Salt, and Pepper for Seasoning

Over medium heat, simmer the chopped onion, carrot, garlic and an optional smidge of olive oil in a pan. Heat up for about 2 minutes then add the chopped kielbasa. Season with basil and a dash of salt and pepper if you wish. Cook everything together for about 12-15 minutes stirring occasionally.

KL 4

Next, add a can of diced tomatoes and an 8 oz can of tomato paste. Mix everything together, season with more basil and fresh parsley, along with salt and pepper.

KL 3

Let the sauce simmer on the stove covered on low heat for at least 20 minutes.

KL 5

Noodles:

Since I was making a smaller portion I bought a smaller box of lasagna noodles (De Cecco) from a local specialty store called the Italian Store in Arlington, VA (this is also where I bought the Mozzarella and Romano).

I cooked the whole package of Lasagna noodles but didn’t use them all in the dish. I salted the water and also put a dash of olive oil in it and boiled the noodles for 8-10 minutes then drain the water. I further cooled the noodles off by running cold water over the strainer n the sink.

KL 1

Four Cheese Mixture: (make while the sauce is simmering and the noodles boiling)

1 cup Ricotta Cheese

1/2 cup Mozzarella Cheese

1/3 cup Romano Cheese

1/4 cup Feta Cheese

1 Beaten Egg

Stir everything together and add a dash of black pepper.

KL 7

Once the Kielbasa Sauce has simmered for at least 20 minutes, the cheese mixture is complete, and the noodles are cooked, it’s time for the layering.

Set the oven to 375 degrees Fahrenheit.

Start with one layer of lasagna noodles slightly overlapping each other in the bottom of a casserole dish (my pan accommodated 4  noodles per layer).

Next, pour a portion of the sauce over the noodles so there is a thin layer covering the entire area of lasagna noodles.

Afterwards use a spoon to place dollops of the cheese mixture over the sauce, I did 9 1-inch dollops per layer then smeared them gently to spread them out over the sauce.

Keep layering until you run out of room or ingredients and if you so desire, sprinkle some extra cheese on top before covering it with tin foil and placing it in the oven.

Cook for 30 minutes. If you want the top to be a little crunchier then take the foil off after 20 minutes of cooking and leave it uncovered for the last ten minutes.

KL 9.jpg

Voila!