Easy Comfort Pasta: Spaghetti with Garlic and Prosciutto Breadcrumbs

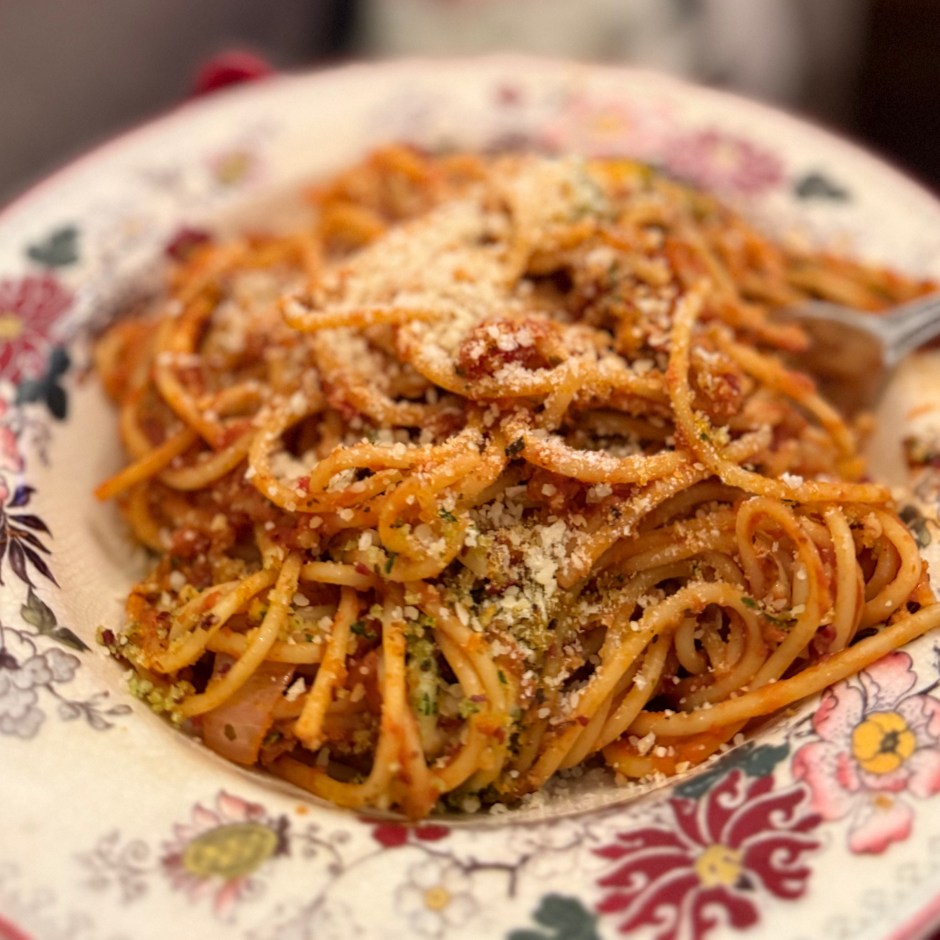
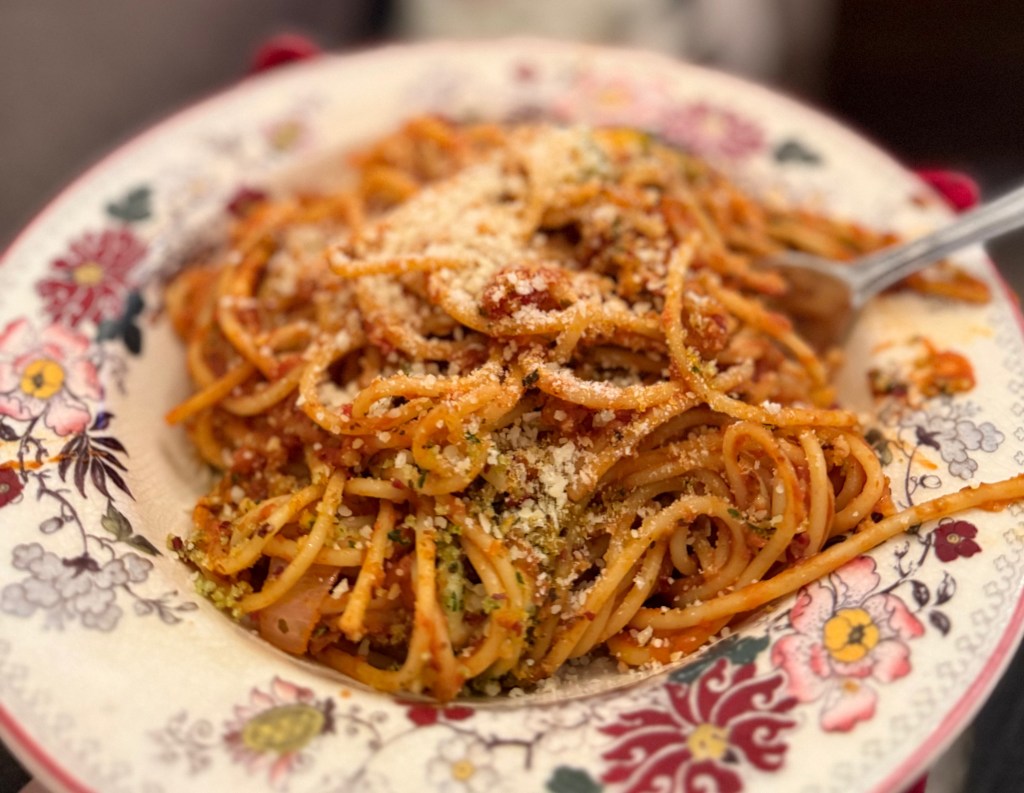
I didn’t have any plans to make this, but I was at a loss for what to make one night last week. I took a look through my pantry and fridge and saw that I had some leftover beef prosciutto and mozzarella cheese, and the meal just came together. A few simple pantry ingredients that really jazzed up the typical jarred spaghetti night.

Ingredients:

  • 16 oz dry spaghetti pasta
  • 24 oz jar of your favorite marinara sauce (Rao’s is my favorite)
  • 4-6 oz beef or pork prosciutto (I used the Trader Joe’s beef proscuitto)
  • 1/2 cup panko breadcrumbs
  • 6 oz mozzarella cheese
  • 1/4 cup parmesan cheese + extra for adding at the end
  • 1 tablespoon butter
  • 2 tablespoons olive oil
  • 2-4 cloves of garlic
  • 1 tbsp fresh parsley
  • 1 tsp aglio olio seasoning from Trader Joe’s or Italian seasoning blend you prefer
  • 1 diced yellow onion
  • salt & pepper
  • optional for added spice – Calabrian Chili Paste / red pepper flakes

Directions:

  1. Lay prosciutto spaced out on an oven tray and bake for 8-10 minutes at 425 degrees Fahrenheit. When taking the sheet out of the oven, leave the prosciutto on the tray to crisp up until cool. Keep the oven on 425 degrees.
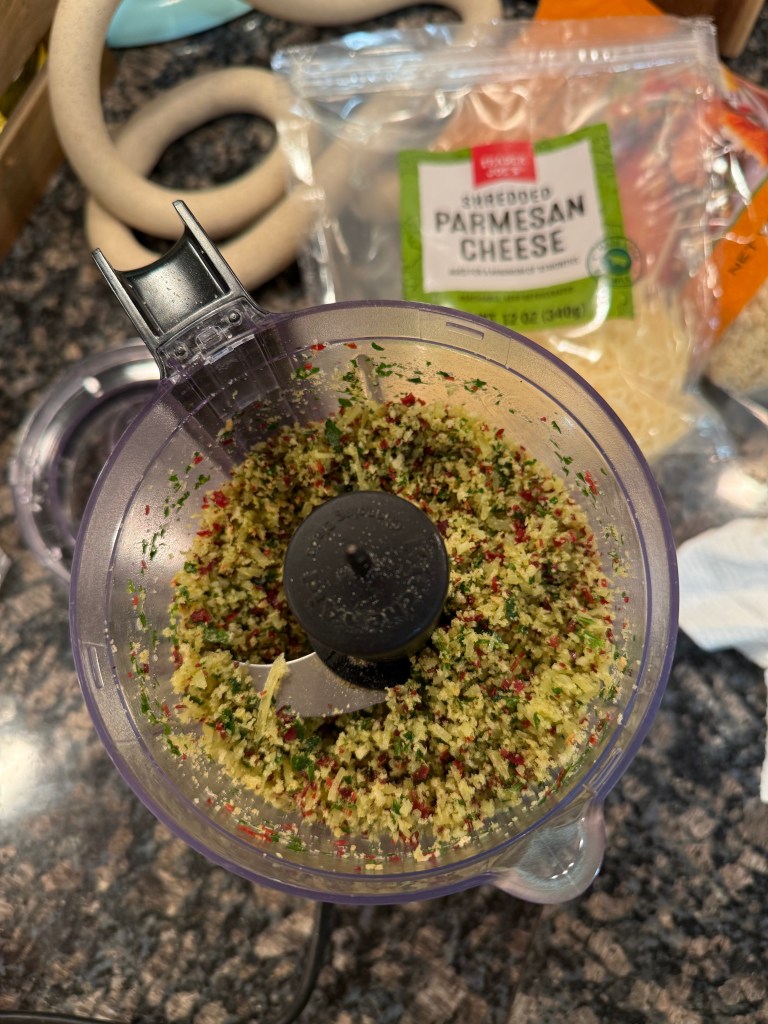
  2. Once cool, add prosciutto to a food processor along with the bread crumbs, one tbsp butter, one tbsp olive oil, 1/4 cup of parmesan cheese, 1 tbsp parsley, 1/2 tsp garlic salt, aglio olio seasoning, and salt/pepper. Blend 10-15 seconds until just blended.
  3. Cook pasta according to instructions, likely boil in a large pot of salted water on the stove for 9-11 minutes.
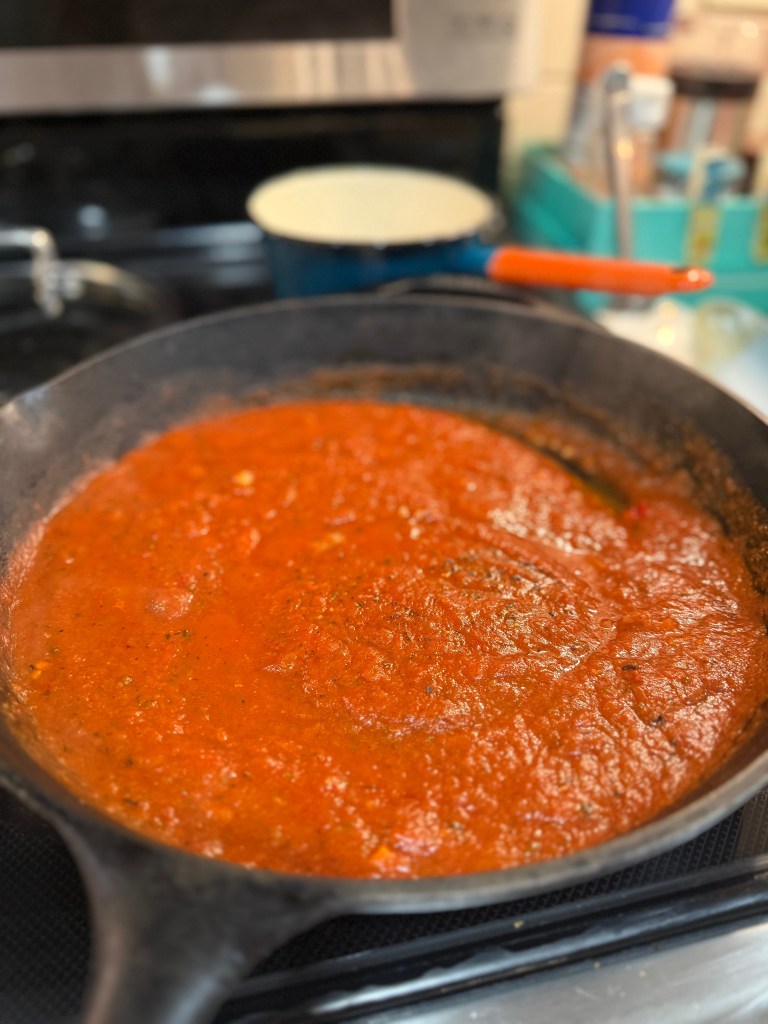
  4. Place a large oven-safe cast-iron pan over medium heat on the stove. Drizzle with olive oil, add diced onion, and sauté for 4-5 minutes. Add garlic and either red pepper flakes or a tablespoon of Calabrian chili paste for added spice.
  5. Sauté for 1-2 minutes until fragrant, then add the marinara sauce. Turn the heat down and let the sauce simmer on low until the pasta is done cooking.
  6. Once done cooking, drain the pasta and add it to the cast-iron pan with your sauce and stir.
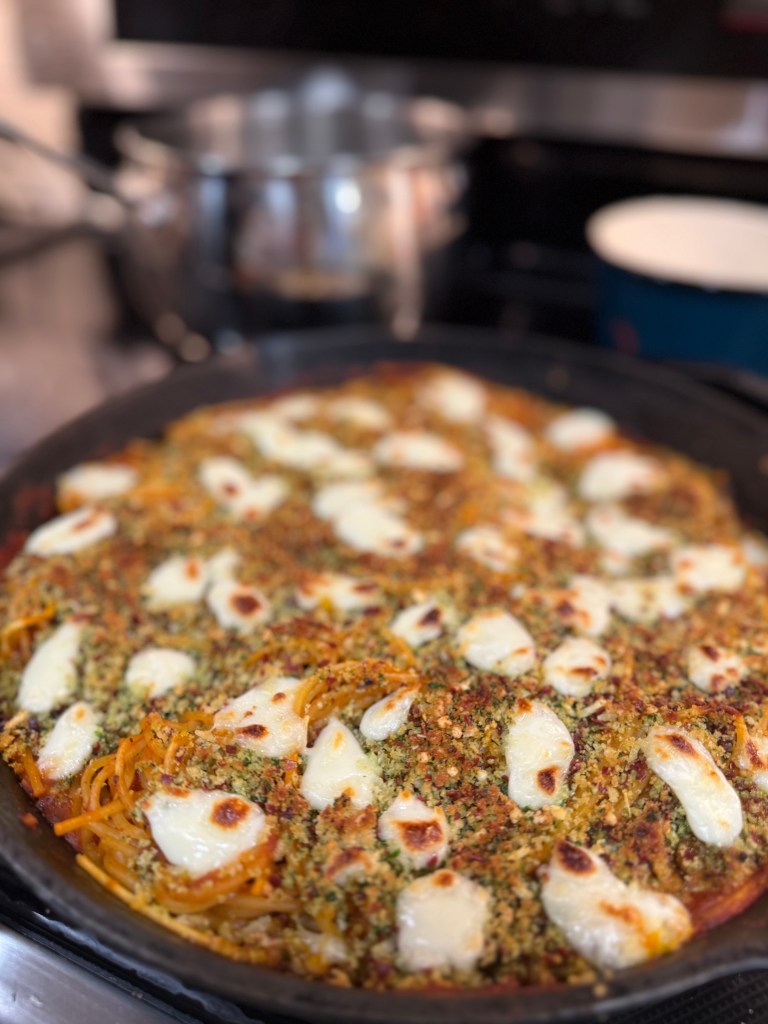
  7. Add breadcrumbs and mozzarella cheese evenly on top and bake in the oven for 15 minutes.
  8. Be careful from removing from the oven. I love these handle protectors that I slip on after I take my cast-iron pan out of the oven!
  9. Sprinkle with extra parmesan cheese and enjoy!

If you make it, I would love to know what you think and if you made any tweaks or adjustments!

❤ Natalie Anne

(This post contains affiliate links, and we will be compensated if you make a purchase after clicking through our links.)

Easy Overnight Pumpkin Brioche Baked French Toast | Cozy Brunch Recipes for the Fall Season

I LOVE French toast. Who doesn’t? But I especially love pumpkin French toast. As much as I would love to spend my entire day baking homemade pumpkin brioche bread, I just don’t have the time these days! I’m in the midst of wedding season (check out my wedding photography here!) and it’s hard to find time to plan complicated recipes. When I came across the pumpkin brioche bread at Trader Joe’s, I knew immediately that it would make the most incredible French toast recipe, and it did! I also incorporated Trader Joe’s non-dairy cinnamon bun oat creamer, but you can use any fall-flavored coffee creamer you’d like! I’m never able to finish a whole container of coffee creamer before it goes bad, so I love adding it to baking recipes whenever I get the chance!

Ingredients:

1 loaf of pumpkin broiche bread (homemade or from Trader Joe’s!)
8 eggs
3/4 cup half & half
3/4 cup non-dairy cinnamon bun oat creamer from Trader Joe’s (or other fall-flavored coffee creamer)
1/4 cup melted butter
1/4 cup maple syrup
1/4 cup brown sugar
2 tsp bourbon vanilla extract
1 tsp ground organic cinnamon
Pinch of salt

Instructions:

1. Butter a deep 9×13 baking dish.
2. Arrange slices of the brioche bread to cover the bottom of the pan. You can overlap bread slices if needed.
3. Beat the eggs in a large bowl. Add the half & half, flavored creamer, melted butter, maple syrup, brown sugar, vanilla extract, cinnamon, and salt to the bowl. Stir until combined. Pour the egg mixture over the bread.
4. Cover and place in the refrigerator overnight, or at least for 30-45 minutes.
5. When ready to cook, preheat the oven to 350 degrees. You can add a few extra pats of butter if you’d like your French toast to be extra buttery!
6. Cook for 35-40 minutes, or until golden brown.
7. Serve with butter and maple syrup! I also love my french toast with a scoop of cream cheese, or in this case, pumpkin cream cheese! 🙂 Enjoy!

❤ Myles Katherine


This post contains affiliate links and we will be compensated if you make a purchase after clicking through our links. 

Delicious Pumpkin Cupcake Muffins with Molasses Cream Cheese Filling & Bourbon Frosting

September is here and I decided that I needed to make something delicious/warm/pumpkin-y to help me forget my upcoming winter woes. I couldn’t find a pumpkin cupcake recipe that had a filling AND a frosting, so I combined a few different recipes and invented my own. & it was totally worth it. Though I would consider them more “Muffcakes” than cupcakes or muffins. Or “puffcakes” since they are pumpkin. YAY I LOVE PUMPKIN (AND BOURBON)!

Cake:

  • 2 cups all-purpose flour
  • 1 & 3/4 cup sugar
  • 1 tbsp cinnamon
  • 1/2 tsp ginger
  • 1/2 tsp nutmeg
  • 1/4 sp. ground cloves
  • 2 tsp baking soda
  • 3 eggs
  • 1 cup vegetable oil
  • 1 1/2 cups pumpkin puree (I used a Canned Pumpkin Pie Mix– it gives it some extra fall spicy-ness)

Filling:

  • 8 oz. cream cheese, softened (if you can get a hold of pumpkin cream cheese, it’s even better. Trader Joe’s has one in the fall!)
  • 2 tbsp molasses
  • 1/3 cup sugar
  • 1/2 tsp vanilla
  • 1/2 tsp cinnamon
  • pinch of salt

Cream Cheese Frosting:

  • 8 ounces cream cheese, at room temperature (again, you can try it with pumpkin cream cheese!)
  • 1/2 cup butter, at room temperature
  • 1/4 cup pumpkin puree (just use some of the leftovers from above)
  • 1 tsp cinnamon
  • 2-4 cups powdered sugar
  • 1 tsp vanilla extract
  • 2-3 tsp bourbon

Instructions:

  1. Preheat the oven to 350 degrees.
  2. Line muffin pans with 24 muffin liners & set aside.
  3. In a large bowl combine the dry ingredients and stir until well combined. In a smaller bowl mix together the eggs, oil and pumpkin.
  4. Pour the wet ingredients into the dry ingredients and mix together until smooth.
  5. Fill the muffin liners 1/2 of the way with the pumpkin batter.
  6. With a mixer cream all of the filling ingredients together.
  7. Drop small spoonfuls of the filling (about a teaspoon) into the center of each filled muffin liner.
  8. Add a little more batter to each cupcake, enough to cover the cream cheese. Bake for about 18-20 minutes or until the edges of the cupcake begin to harden. (Don’t test in the middle since the middle will stay soft and gooey).
  9. While the cupcakes are baking, mix together the cream cheese, butter, cinnamon and pumpkin in a medium bowl until fluffy to make the frosting. Gradually add powdered sugar. Fold in the bourbon and vanilla extract at the end and adjust for taste. 
  10. Frost the cupcakes once cooled. Dash with cinnamon for added appeal 😀
  11. Enjoy!

By Myles Katherine ❤

This post contains affiliate links and we will be compensated if you make a purchase after clicking through our links. 

Hormone-Balancing Maca Peanut Butter Protein Power Bites for Endometriosis

I’ve struggled with endometriosis and hormone imbalances for years. I’ve read every book and blog and article on endometriosis I can get my hands on, searching for ways to help with my symptoms. I can tell you from experience that endometriosis will not disappear just because you change your diet, but I will say that diet can help minimize symptoms, which is super important! I try to keep these protein power bites on hands at all times because I immediately notice them helping with my digestion the second I eat one. My digestion is a rollercoaster every month and I try my best to maintain a balanced diet filled with tons of protein, vegetables and fiber. It’s hard though! But these protein bites help to fill in those gaps on days when I don’t feel like cooking every meal. I love having one in the morning with my coffee, or in the afternoon for tea time!

HORMONE-BALANCING INGREDIENTS

If you’ve never heard of maca, it’s a root that you can buy in powdered form and add to smoothies, baked goods, and of course, these protein bites! You can find it on Amazon here. I recommend organic! Maca is known for it’s potential to assist in balancing hormones, particularly estrogen. Endometriosis is an estrogen-dependent condition, so balancing estrogen is essential. Personally, I have high estrogen, or “estrogen dominance”, and I truly believe this is why I struggle with endometriosis. Maca is also known to potentially help with fertility, menopausal symptoms and libido too. It even helps with stress management, energy and mood. It’s an incredible tool for women with hormonal issues. I urge you to do your own research and learn more about this amazing root!

Another issue for women with endometriosis is maintaining healthy digestion. With our hormones being all over the place, it’s a struggle to manage digestion and regularity. The flax meal in these bites help to regulate digestion and aids in fiber intake. Flax meal is also known to help balance estrogen too! It’s a win-win!

Chia seeds are filled with Omega-3 fatty acids, when are super helpful with inflammation. When I’m having a flare-up with endometriosis, I try to focus on anti-inflammatory foods. Eating these protein bites consistently helps to ward off those flare-ups by combatting inflammation. Chia seeds also have tons of antioxidants, which help to ward off cancer and protect our cells!

I also added cinnamon, which is also known for it’s anti-inflammatory properties! Cinnamon helps calm digestion too.

And let’s not forget the oats! Oats are heart-healthy, fiber-filled, and help to stabilize blood sugar levels, which ultimately helps to balance hormones!

Here is the full recipe for these super tasty bites! I’ve even gotten my husband addicted to these. They are the perfect protein boost at any time of day. Sometimes I’ll leave out the maca for a more peanut-butter forward flavor. You can also roll these in hemp seeds as the last step, for extra nutritional value. Or even add dark chocolate chips! Unfortunately, I have high iron due to some of my hormonal issues, so I have to be careful with certain ingredients.

I hope you love these as much as I do! Maca is an interesting flavor that is somewhat earthy and nutty. It can be quite a dominating flavor and may take some getting used to. I recommend trying these with and without the maca to see the difference! They are both delicious and will help balance hormones.

Thanks so much for stopping by! Let me know if you try these out!

❤ Myles Katherine

INGREDIENTS:

(makes about 12 protein bites)

1 cup rolled oats
1/2 cup flax seed meal
1/2 cup organic peanut butter
1/4 cup maple syrup or honey ( I prefer maple syrup!)
3 tbsp chia seeds
2 tbsp maca powder
1 tsp vanilla extract
1/2 tsp cinnamon

  1. Place a piece of parchment paper on a baking sheet.
  2. Add all ingredients to a large bowl and mix together. If the dough is too dry or crumbly, just add more maple syrup or honey, 1 tsp at a time. It really all depends on the consistency of your peanut butter!
  3. Roll into 1-inch balls using your hands and place on the baking sheet. Makes about 12 protein bites.
  4. Place in the freezer for at least an hour. Once set (just so they don’t stick together in the ziploc bag), you can put them in a freezer ziploc bag and pull one out whenever you’d like! You can also keep them in the fridge if you’d prefer, but I like to store them in the freezer so they last longer.
  5. Enjoy!

Refreshing Elderflower Chia Seed Pudding with Turkish Honey and Raspberries

unnamedCP 1

Chia seeds are high in fiber, protein, calcium, antioxidants, and so much more. They are amazingly delicious and are the spotlight of my new favorite breakfast/dessert. When soaked in almond milk (or any type of milk/liquid) for just 30 minutes Chia seeds expand to create a natural pudding consistency to which you can add honey, brown sugar, and fruit (like pomegranate seeds, strawberries, raspberries etc.). Lately, I’ve been getting the Chai Chia Pot with Pomegranate Seeds from Pret a Manger once a week for a delightful breakfast, until I decided to buy the ingredients and make my own homemade batch of Chia seed pudding this past weekend.

I adapted it from a recipe I found on Pinterest

I tripled the original recipe to make sure I had plenty of leftovers for the next several days and I also added fruit, brown sugar and honey:

Ingredients for the pudding (4 servings):

  1. 3/4 cup of almond or oat milk (I used vanilla flavored almond milk)
  2. 1 can of coconut milk
  3. 6 tablespoons of chia seeds

Additional Flavors and Sweetening:

  1. Elderflower Syrup
  2. Turkish Honey or Maple Syrup (I always like honey in the Spring/Summer and Maple Syrup in Fall/Winter)
  3. Light Brown Sugar
  4. 1/2 cup Strawberries
  5. 1/2 cup Raspberries

CP 4

Directions:

  1. I have a large Mason Jar cocktail shaker that I combined the almond milk, coconut milk, and Chia seeds into. I also added a tablespoon of honey and a tablespoon of the Elderflower Syrup into the jar before putting the lid on it and shaking it for a minute.
  2. Let the mixture sit in the fridge for thirty minutes (or longer)
  3. When the mixture has become solid (similar to a tapioca consistency) mix 1 teaspoon of brown sugar into each serving and top with whatever fruits you desire or are in season!
  4. Enjoy!

CP 2

CP 3

As an Amazon Associate, I earn from qualifying purchases.