White Chocolate, Strawberry, and Cream Cheese Cookies

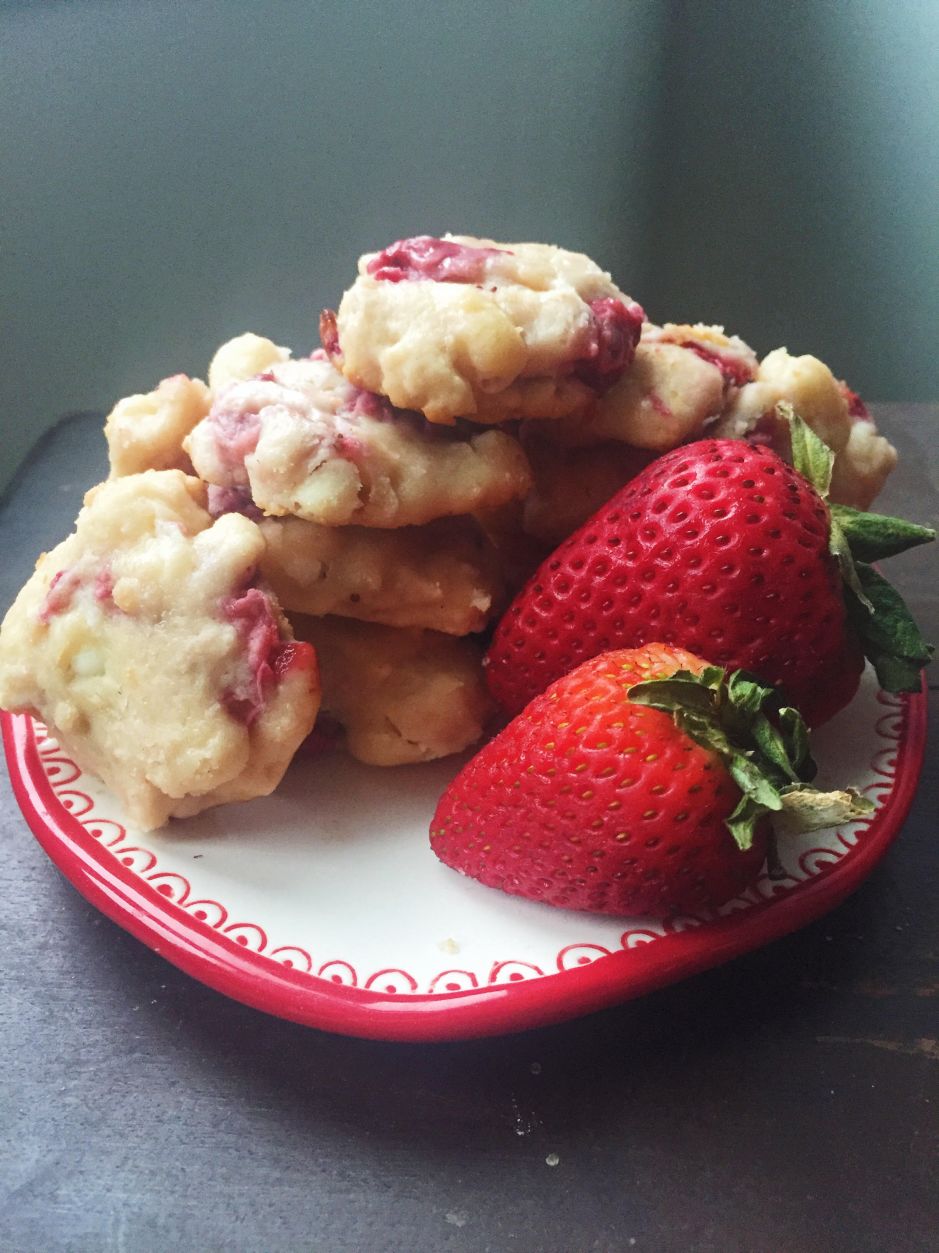
I’ve been looking for a new cookie recipe to celebrate the arrival of this beautiful Spring weather we are having in Virginia and also for an excuse to indulge in strawberries and chocolate. I found this perfect recipe on Pinterest and knew I had to make them ASAP.

As luck would have it, the Annual Foxfield Spring Horse Races are this weekend in Charlottesville, Virginia, and my friends and I are joining in on the festivities for our fifth year in a row. We decided to do a potluck tailgate, and I signed up for desserts and cannot wait to contribute these tasty cookies!

I decided to double the batch from the original recipe (which made at least 50 cookies!). i also used 2 teaspoons of cream of tartar mixed with one teaspoon of baking soda to replace the baking powder ( I only used 1 teaspoon of this mixture in the dough) since the Giant near my apartment was all out of baking powder- womp. I do have to say the dough was a bit gooey and difficult to work with at first, but setting them in the fridge for a few minutes before baking definitely helped. The consistency of the cookies ended up being soft and chewy…exactly how I love wanted them!

Ingredients (for a 24-count batch):

1 1/4 cup all-purpose flour

1/2 teaspoon baking powder

1/8 teaspoon salt

1/4 cup unsalted butter-softened

4 oz cream cheese-softened

3/4 cup sugar

1 egg

1 teaspoons vanilla extract

3/4 cup chopped fresh strawberries

2 tablespoon lemon juice

1-2 tablespoon flour

5 oz white chocolate, chopped (I used Nestle white chocolate chips)

SC 3

Instructions:

  1. Preheat the oven to 350 F and line pans with parchment paper.
  2. Pour fresh lemon juice over chopped strawberries, drain them after a few minutes.
  3. Whisk together 1 1/4 cup all-purpose flour, salt and baking powder and set aside.
  4. Beat butter with sugar and cream cheese until it’s light and fluffy.
  5. Add egg and vanilla and mix well.
  6. Gradually add flour mixture and mix until it’s well combined.
  7. Stir in chopped white chocolate.
  8. Sprinkle strawberries with 1-2 tablespoon flour, toss them until all strawberries are coated with thin layer of flour and then stir them really gently in the batter.
  9. Drop heaping tablespoon of batter onto pan leaving an inch space between.
  10. Set the cookies in the refrigerator for 5-10 minutes before baking.
  11. Bake for 13-15 minutes( until the edges become golden brown).
  12. Indulge!

SC 5

Funfetti Mug Cake for One

FMC 2

By Natalie Anne ❤

I’ve tried to make a few Mug Cakes before, mainly just Chocolate Chip Cookie-esque ones, but they never seem to turn out how I want them to. However, last night I was craving something sweet to eat while watching the new season of Bates Motel and realized I had about half a bag of Funfetti Cake Mix sitting in my cabinet. So I thought I would try another mug cake, hoping that this one wouldn’t fail me. Spoiler Alert: I finally found a mug cake I like, and this is it!

Ingredients (Adapted from here):

  1. 8 Tablespoons of Pillsbury’s Funfetti Cake Mix
  2. 1 Beaten Egg
  3. 1 Tablespoon of Vegetable Oil (I used Canola Oil)
  4. 3 Tablespoons of Water
  5. 1-2 Tablespoons of Funfetti Icing

FMC 3

Whip up the Cake Mix, Egg, Oil, and Water into a good ole Coffee Mug and stick it in the microwave for 1 minute and 30 seconds (I like my cakes/cookies really moist so I only cooked it for 1 minute and 15 seconds!).

FMC 4

When it’s done, if you want to make it extra tasty, plop a dollop or two of the Funfetti icing on top of the baby cake. Or if you’re feeling really ambitious, while everything is still hot, mix the icing fully in with the mug cake and you’ve got a warm, gooey Funfetti mug of wonderful deliciousness!

FMC 1

There ya go, in less than five minutes you’ve got a warm mug of Funfetti in your hand and a new trick up your sleeve!

Review: Blue Apron Food Subscription Box

By Natalie Anne ❤

BA 4

I love to cook. I am inspired by discovering new recipes and flavors. But, sometimes, it can be daunting to have to go to the grocery store and collect a bunch of different ingredients. Sometimes you’re not sure which is the freshest or the most delicious or the easiest on your wallet. This is where a subscription to Blue Apron can come in handy. They send you a box of fresh, local ingredients once a week for three meals that feeds two people (with plenty of leftovers). They are prearranged menus that focus on  balanced and healthful recipes.

Every box comes with a step-by-step instruction packet with pictures for preparing and cooking your food. Plus, you can always change up the recipes to make it your own if you choose. Blue Apron sends you the exact amount of items and ingredients you need: spices, proteins, milk, eggs, the list goes on and on. The only things not included are salt, pepper, and olive oil (pretty easy to handle those on your own).

My favorite part about Blue Apron is that you can sign up for whatever weeks you desire. You can have a subscription and receive a box every week or whenever you feel ready for one. You can browse through the menus online and click which weeks you wanna cook with Blue Apron and it’s that easy.

The recipes have broadened my cooking abilities with new flavors and it has been fun using ingredients I would have felt too intimidated to pick up in a grocery store.

The menu for my first week with Blue Apron was:

Trinidadian Chicken Curry and Coconut Grits with a side of Collard Greens

BA 2

BA 5

My Favorite 🙂


Pretzel Burgers with a Hoppy Cheddar Sauce and Sweet Potato Rounds:

BA 1

BA 7

and Acorn Squash Risotto with Crispy Sage and Radicchio Salad

BA 9